Raspberry Lemonade Cupcakes

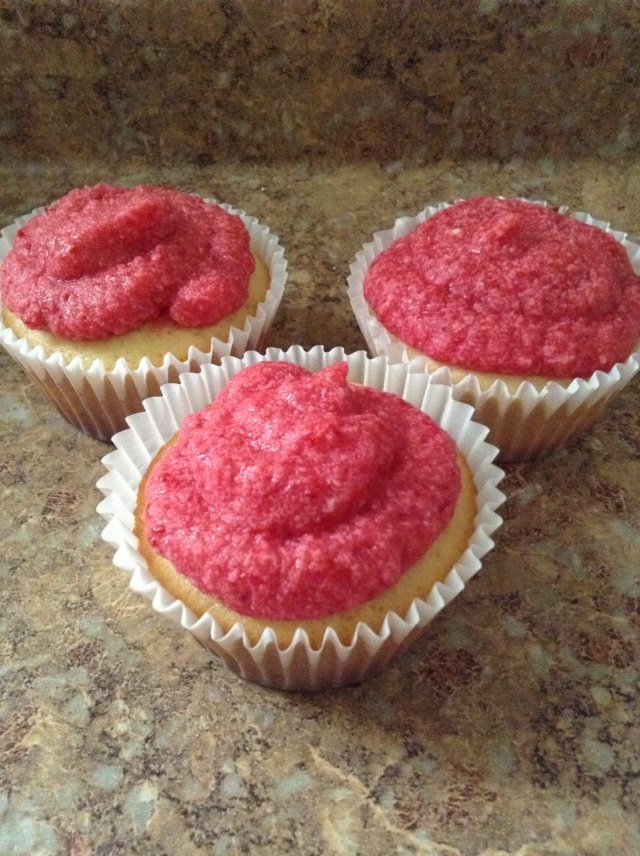
After all of the madness last week, making cupcakes for everyone else, I decided that this week, I was going to make some cupcakes that sounded delicious to ME!

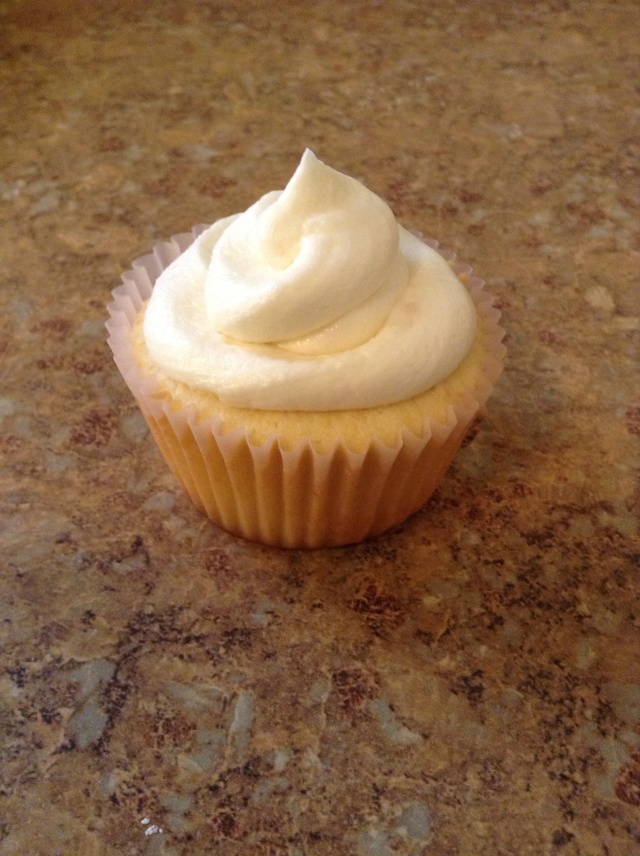
Browsing pinterest (pretty much my favorite website ever), I found the recipe for Lemonade Cupcakes with Raspberry Frosting. I know most of you are probably still battling your way into spring, but here in Southern California, summer is already in full force. With temperatures spiking above 100 degrees every couple of days, these cupcakes sounded refreshing and delicious.

I was right!

image

Lemonade Cupcakes:

made 36

Ingredients:

1 cup butter, room temperature

2 cups sugar

4 eggs

1 tsp vanilla

3 cups all-purpose flour

2 tsp baking powder

1/2 tsp salt

grated zest of 2 lemons

lemon juice from 2 lemons

1 cup milk

Directions:

1. Preheat oven to 375 degrees Fahrenheit. Prepare cupcake pan with cupcake wrappers.

2. In a large bowl, beat the butter, sugar, and lemon zest with an electric mixer until light and fluffy. Beat in eggs one at a time. Beat in vanilla.

3. In a small bowl, stir together flour, baking powder, and salt. Add to the butter mixture 1/3 at a time, alternating with 1/2 the milk and 1/2 the lemon juice. Beat until just combined.

4. Fill cupcake wrappers about 1/2 – 2/3 full and bake in oven for 20 minutes. Remove cupcakes from tin and allow to cool completely before frosting.

Raspberry Frosting:

Ingredients:

1 cup fresh raspberries (or thawed from frozen)

1 cup butter, room temperature

3 cups powdered sugar

Directions:

1. In a food processor, puree raspberries until smooth. If you like, press the mixture through a sieve to remove the seeds (I did not do this, which is why the frosting looks “chunky.” If you don’t mind the appearance, I wouldn’t bother).

2. In a medium bowl, beat the butter and half of the powdered sugar together until smooth. Add the raspberry puree. Then add the rest of the sugar a bit at a time, mixing until you have a spreadable consistency. Add a splash or two of water if necessary.

3. Put into piping bag and pipe onto fully cooled cupcakes.

Reviews:

Elle: 10/10 These cupcakes are delicious! It tastes just like a raspberry lemonade in cupcake form. The cupcake itself was light and fluffy with just the right amount of lemon in it that the raspberry didn’t overpower it. The raspberry frosting was delicious and sweet without being too sweet. My favorites so far!

Jeremy: 9.5/10 It’s an even mix of raspberry and lemon. One doesn’t overpower the other. I think you should strain the seeds out of the frosting, for aesthetic reasons.

Nate: 8/10 Delicious! I like how sweet the lemon was. It reminded me of a danish or a pastry with the raspberry. The mix was perfect.

Trevor: 8/10 Let me first say I’m not a big fan of raspberry. However, it was a really nice mix of lemon and raspberry.  The lemon is really subdued. I was expecting it to be a lot stronger, but I’m glad it wasn’t. It let the raspberry take over a little.

Posted in Cooking, My Life | 1 Comment

4 Cupcakes in 4 Days – Part 4 – Vanilla-nilla Cupcakes

Alright, so originally we were going to make a coffee cupcake with chocolate frosting for Jeremy’s mom, Katie for Mother’s Day (along with another batch of the lemon lemon LEMON ones for my mom). But at Jeremy’s birthday dinner, while talking about all kinds of cupcakes everyone thought I should try in the future (I have a huge list now, haha), she mentioned that she really just wanted vanilla cupcakes with vanilla frosting. So instead of searching for a yummy coffee/chocolate one, we went off in search of a delicious vanilla one.

For the cupcake, I decided to use the recipe from the lemon lemon LEMON cupcakes, minus the lemon zest, plus some extra vanilla extract. For the frosting, I tried out this vanilla buttercream, that is supposedly based on the one by Sprinkle’s Cupcakes.

image

Vanilla-nilla Cupcakes:

Makes 12 cupcakes (made 28)
Ingredients:
1 package (8 ounces) cream cheese
1/2 cup butter, room temperature
1-1/4 cups sugar
1 Tbsp + 1 tsp vanilla extract
4 eggs
1/4 cup corn oil
1/4 cup whole milk
2 cups all-purpose flour
2 tsp baking powder
1/2 tsp salt
Directions:
1. Preheat oven to 325 degrees Fahrenheit. Prepare cupcake pan with cupcake liners.
2.  In a medium bowl, combine flour, baking powder, and salt in a bowl and set aside.
3. In a large bowl, combine cream cheese, butter, sugar, and vanilla extract until light and fluffy (abbout 3-4 minutes). Add eggs, one at  a time, beating after each addition. Next, beat in oil. Graduaally add flour mixture in three parts, alternating with milk in 2 parts.
4. Fill cupcake liners 1/2-2/3 full. Bake 25-30 minutes or until toothpick inserted in middle comes oout clean.
5. Remove from pan and cool completely before frosting.
Vanilla Buttercream Frosting:
Ingredients:
1 cup butter, softened
3-1/2 cups powdered sugar
1 teaspoon milk
1 teaspoon vanilla extract
1/8 teaspoon salt
Directions:
1. In a bowl, combine butter, sugar, and salt. Beat until blended.
2. Add milk and vanilla and beat an additional 3-5 minutes, or until smooth and creamy.
Reviews:
Elle: 9/10 If you like powdered sugar, you will LOVE this frosting. It tastes like a cramy powdered sugar, but not overpowering. The cupcake itself was much better with the added vanilla flavoring.
Jeremy: 9.5/10 The frosting wasn’t completely smooth – the recipe didn’t call for enough liquid to combat all of the dry ingredients. Cupcake is better with the vanilla. It’s not just a plain cake anymore. It’s a vanilla cake.
Nate: 8.5/10 I like vanilla, but it’s not my favorite. As far as the cake, it was nice and fluffy and I like the flavor. The frosting was really good. I thought it was blended well. I felt like the cupcake overall needed a little extra something to finish it off. I don’t know what it was missing, but I think it needed another flavor.
Trevor: 7.5/10 It was a sugar overload, but not so much that you wanted to gag from the amount of sugar.
Posted in Cooking, My Life | Leave a comment

4 Cupcakes in 4 Days – Part 3 – Brownie Cupcakes with Chocolate Chip Cookie Dough Frosting

Today was Jeremy’s birthday, and it took a while to find just the right cupcakes to make for him. In the end, he decided he wanted brownie cupcakes with cookie dough frosting. And based on the things I had available in my house, I actually used this recipe for the brownie cupcakes, and these directions for the cookie dough frosting. I made some minor adjustments, so below are my modified recipes.

image

Brownie Cupcakes:

Makes 12 (made 14)
Ingredients:
 1-1/4 cups all-purpose flour
 1/4 tsp baking powder
1/4 tsp salt
1 cup granulated sugar
1/2 cup packed dark brown sugar
1/2 cup + 2 Tbsp cocoa powder
3/4 cup butter, melted
2 large eggs
1-1/2 tsp vanilla extract
2 Tbsp milk
Directions:
1. Preheat oven to 350 degrees Fahrenheit. Prepare cupcake pan with cupcake liners.
2. In a medium mixing bowl, whisk together flour, baking powder, and salt. Set aside.
3. In a large mixing bowl, whisk together sugar, brown sugar, and cocoa powder. Pour in melted butter, and combine well. Mix in eggs and vanilla extract. Stir in milk.
4. Add flour mixture in 3 parts, mixing well between each addition. Batter should be fairly thick.
5. Fill each cupcake liner about 2/3 full. Bake in oven about 16-20 minutes (mine ended up needing 24 minutes), or until toothpick inserted in middle comes out clean. Cook a little less for more gooey brownies.
6. Remove from cupcake pan and allow to cool completely before frosting.
Chocolate Chip Cookie Dough Batter Frosting:
Ingredients:
2 cups all-purpose flour
1/2 tsp salt
3/4 cup unsalted butter, melted
1 cup packed dark brown sugar
1/2 cup white sugar
1 Tbsp vanilla extract
1/4 cup milk
1 cup heavy cream
Chocolate chips to top cupcakes with.
Directions:
1. Mix all ingredients (minus the chocolate chips and heavy cream) in a big bowl until combined.
2. Measure out 2 cups of the cookie dough mix, and feel free to eat the remainder!
3. Add the heavy cream and mix well.
4. Once cupcakes are frosted, sprinkle the tops with chocolate chips.
Reviews:
Elle: 9/10 This were super good! The brownie cupcake was fudgey and moist. The cookie dough frosting was delicious. They went together really well. I’m not really a “chocolate girl,” but if you are, you are going to love these!
Jeremy: 10/10 These are my favorites so far! Cupcake was perfect – tasted just like a brownie. With the cookie dough on top, it was just a combination of deliciousness.
Nate: 9/10 But only because they were refrigerated, and not anything wrong with the flavor. I almost wanted the frosting to be a little bit sweeter.
Trevor: 9.5/10 I liked it chilled. Much easier to eat a cupcake with a solidified frosting. It was kind of like eating a fluffier version of a cookie. It’s an airy chocolate chip cookie in a wrapper.
Richard: 8/10 I liked them chilled. I thought the cookie dough was going to be soft and squishy, and I was worried it would be messy to eat. But it wasn’t.
Dano: 8/10 The choclate brownie part was really yummy. The cookie frosting with the brownie was almost a little too much.
Posted in Cooking, My Life | Leave a comment

4 Cupcakes in 4 Days – Part 2 – Lemon Lemon LEMON Cupcakes

My mom LOVES lemon, so I wanted to make her a very lemony cupcake. I found a recipe for “Triple Citrus Cupcakes,” that used orange zest, lemon zest, and lime juice. I substituted lemon zest for the orange zest, and lemon juice for the lime juice to make it even more lemony. Plus, I added a lemon curd filling. So far, everyone who likes lemon says this is by far and away their favorite of the cupcakes I have made so far (including the brownie/cookie dough cupcakes I will post about tomorrow).

image

Lemon Lemon LEMON Cupcakes:

Makes 12 cupcakes (made 28)

Ingredients:

1 package (8 ounces) cream cheese, softened
1/2 cup butter, room temperature
1-1/4 cups sugar
2 Tbsp lemon zest
1 tsp vanilla extract
4 eggs
1/4 cup corn oil
1/4 cup whole milk
2 cups all-purpose flour
2 tsp baking powder
1/2 tsp salt
1 jar lemon curd

Directions:

1. Preheat oven to 325 degrees Fahrenheit. Prepare cupcake pan with cupcake liners.
2. In a medium bowl, combine flour, baking powder, and salt in a bowl and set aside.
3. In a large bowl, combine cream cheese, butter, sugar, lemon zest, and vanilla extract until light and fluffy (about 3-4 minutes). Add eggs, one at a time, beating after each addition. Next, beat in oil. Gradually add flour mixture in three parts, alternating with milk in 2 parts.
4. Fill cupcake liners 1/2-2/3 full. Bake 25-30 minutes or until toothpick inserted in middle comes out clean.
5. Remove from pan and cool completely before frosting.

Lemon Glaze Frosting:

Ingredients:

3 cups powdered sugar
1/4 cup butter, room temperature
1 tsp vanilla extract
1 tsp lemon zest
5 Tbsp lemon juice

Directions:

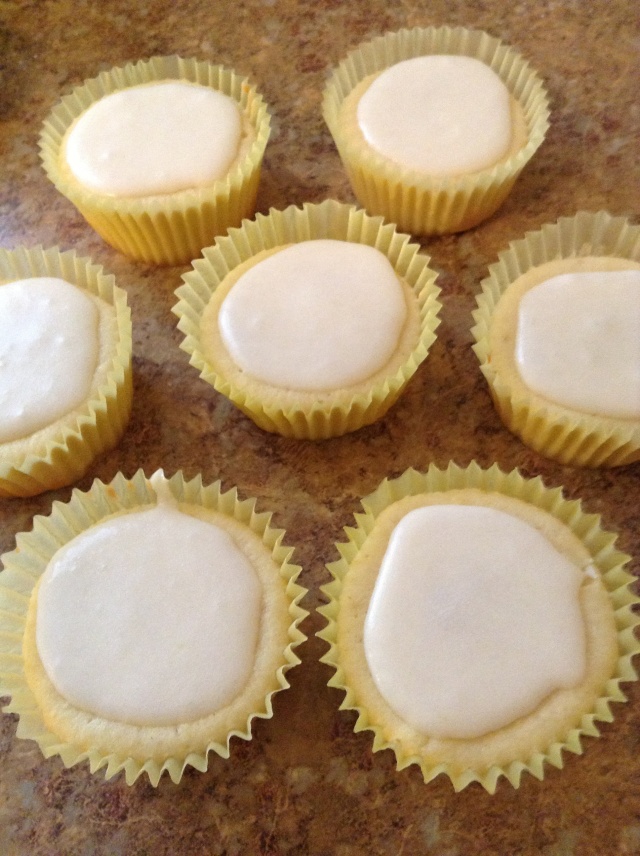
1. In a medium bowl, combine all frosting ingredients, until frosting reaches desired spreading consistency. Frosting should be more of a glaze consistency than a thick frosting.

Assemble Cupcakes:

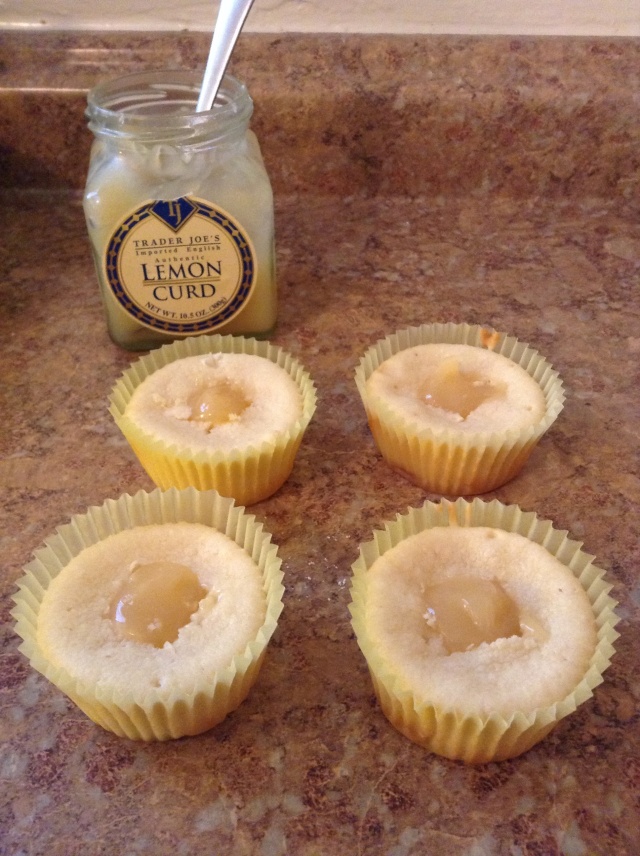
1. Scoop out centers of cupcakes.

image

2. Fill with lemon curd.

image

3. Pipe frosting over the top so no curd shows.

image

4. Refrigerate for a few minutes to harden the glaze.

Reviews:

Elle: 10/10 These are freaking BOMB! I was a little bit disappointed in the actual cupcake. It is not at all lemony, despite the lemon zest. It really just tastes like a vanilla cupcake. I’m very glad we decided to add the lemon curd, because that really pulled the whole cupcake together and made it amazing!

Jeremy: 9/10 The addition of the lemon curd really made this cupcake. Without it, the cupcake was just a little plain.

Nate: 9/10 It was great! I liked how lemony it was compared to a normal lemon cupcake. A standard lemon cupcake is lemon-ish. This was lemonY!

 Trevor didn’t try this cupcake because he doesn’t like lemon flavored stuff.

Richard: 9/10! I liked the texture change between the spongy cupcake, the lemon curd, and the glaze icing. It was a really nice contrast.

Aunt Shannon: Please make these again for Mother’s Day!

Mom: 10/10 Deliciously lemony cupcakes! I made a new descriptive word inspired by them: Gobbly-good! Love their super tarty goodness. What LEMON is supposed to taste like!

Posted in My Life | Leave a comment

Life Updates

For those who have been following my blog, I know it has been quite a while since I posted, and you might be wondering who are all of these people that I talked about in my latest post?

If you don’t care, just skip this post, and wait for Part 2 of my cupcake adventure to post tomorrow. If you do care, here’s the explanation of what’s happened in the past year.

I am no longer a nanny. I got laid off in December of 2011. I was then a nanny for two other kids (ages 11 and 16) for a couple of months before getting laid off again.

I decided that perhaps I needed to get into a more stable line of work, seeing as the economy sucks, and people can’t afford to have private nannies anymore… With that being said, I went to a job fair, and I got hired at Home Depot as a cashier.

In August, we moved out into a 3-bedroom apartment. After Sean and I split up,  three of my coworkers (Jeremy, Nate, and Trevor), who were best friends and looking to move out together, moved into the apartment with me.

Now, Jeremy and I are seeing each other, I have a new dog named Clover (Sean took Kiera when he moved out), and I recently was promoted/had a position change at Home Depot. I am now a bookkeeper and work in the back office.

As far as my arts and crafts go, I am working on a huge undertaking – I want to cross stitch all 150 original Pokemon in their own hoops. So far I have made: Bulbasaur, Blastoise, Caterpie, Butterfree, Abra, Articuno, Diglett, Vulpix, and I am currently working on Kabuto. That makes 8.5/150. I know it will take me a while, but I think they all look super cool, and I am very excited to get these first ones hung up so I can get some pictures of them to share with you all!

Also, I have obviously been doing a lot more cooking. I am no longer vegetarian (gave up back in July of last year, and I keep trying to go back and failing miserably. It is very difficult when we cook collective meals, and the boys are all very carnivorous). I have some new recipes to share with you (have I ever told you how much I love pinterest? Because yea, without pinterest I would be lost in the kitchen, haha).

I think that’s all I have right now for  my life updates. Look forward to tomorrow’s post about Lemon Cupcakes!

-Elle

Posted in My Life | Leave a comment

4 Cupcakes in 4 Days – Part 1 – White Russian Cupcakes

My cupcake fever started when I found this adorable Papyrus brand Mother’s Day card with macarons on it. My mom and I went to France when I was 13, and again when I was 15, and while we were there, we fell in love with French macarons.

I decided that for Mother’s Day, I would try my hand at making my very own macarons for my mom.

Let me tell remind you now that this is a post about cupcakes, not macarons. They turned out absolutely awful. Delicious, but just awful as far as how they were supposed to turn out.

So when that failed, and with my mothers birthday coming up on Thursday, along with Mother’s Day Sunday, I decided perhaps cupcakes would be a better way to go.

Then the boys reminded me that our friend Jack’s birthday was Wednesday. And with Jeremy’s birthday slipping in on Friday, you can now see why I’ve been spending all bloody week in the kitchen!

I am separating this into 4 parts, because I don’t want all 4 cupcake recipes and reviews to be all mushed together (and also because its only Friday, so I haven’t made the Mother’s Day cupcakes yet.

Jacks birthday came first on Wednesday, and a 21st birthday usually means lots of booze and drunken debauchery. But his father was taking us all to a very (VERY) nice restaurant, and some of us had work very (VERY) early the next morning, so we decided to keep it rather tame.

However, when I saw the recipe for White Russian cupcakes, I couldn’t resist giving him a little bit of the normal experience (you know, where the whole night is just alcohol themed).

I found the recipe in IHeartCuppycake’s blog, and made only minor changes (like which brands of alcohol I used).

Here is the recipe, which yielded a whopping 30 cupcakes! Unfortunately I forgot to take a picture of these cupcakes before the party. Sorry!

White Russian Cupcakes:

Ingredients:

2-1/2 cups all-purpose flour

3 tsp baking powder

1/2 tsp salt

1-1/2 cup sugar

12 Tbsp butter, room temperature

2 large eggs + 2 egg whites, room temperature

1 tsp vanilla extract

1 cup heavy cream

1/4 cup Smirnoff Vanilla Vodka

1/4 cup Coffee Liqueur (I used Heritage, but Kahlua works well, too)

Directions:

1. Preheat oven to 350 degrees Fahrenheit. Line cupcake pan with cupcake liners.

2. In a medium bowl, sift flour, baking powder, and salt. Set aside.

3. In a large bowl, beat the sugar and butter until well combined, about 2-3 minutes. Add eggs and egg whites, one at a time, beating on low. Next, add vanilla, Vodka, and 1/4 cup coffee liqueur. Next, add flour mixture in 3 parts, alternating with heavy cream in 2 parts. Mix until combined well.

4. Fill each cupcake liner about 1/2 full. Bake about 17-20 minutes (mine were done in exactly 17 minutes), or until a toothpick inserted in the middle comes out clean.

5. Remove from pan and cool completely before frosting.

Kahlua Swiss Meringue Buttercream:

Ingredients:

5 large eggs whites

1 cup + 2 Tbsp sugar

2 cups unsalted butter, room temperature, cut into pieces

3-4 Tbsp Kahlua ( I used 4 and would use even more next time)

Directions:

1. Place sugar and egg whites in a heat-proof bowl. Set bowl over a pan of gently simmering water. Whisk until sugar is completely dissolved and egg whites are hot to the touch, ~ 3 minutes. Test by rubbing the mixture between your fingers. Texture should be completely smooth.

2. Transfer to a medium bowl, and whisk on high until mixture has cooled completely and has formed stiff glossy peaks (~ 8-10 minutes). Reduce speed to low. Add butter one chunk at a time, mixing completely between additions. Don’t worry if buttercream appears curdled after the addition of the butter. It will become smooth again with continued beating.

3. Add Kahlua and beat until just combined.

4. Switch to paddle blender and beat for about 5 minutes to eliminate any air pockets.

Posted in Cooking, My Life | Leave a comment

Cali Style Quinoa (with Recipe)

Last night I had pulled out the leftover cooked quinoa from the freezer, and put it in the fridge to defrost. I had thought to make some more yummy quinoa patties with it, but today I had another idea. Totally on the spot, pulling things out of the fridge and cabinet  to mix with the quinoa, this is what I came up with.

Cali Style Quinoa (makes 1 bowl)

Ingredients:

Quinoa (pre-cooked, add as much as you want)

1 Egg

Black Beans (pre-cooked, add as much as you want)

1/2 Avocado

Handful of Mozzarella Cheese

Salt, pepper, and soy sauce

Directions: Put the quinoa and egg in a frying pan, cook like you are making fried rice. Add the cooked black beans near the end (to warm them up). Add avocado at the same time if you want it warm, add it after if you want it cold. Put in a bowl and stir in the cheese. It should melt in and sort of stick everything together. Add salt, pepper, and soy sauce to taste.

There are lots of other things you could throw in, too. I just used what I happened to have on hand. Other things that sound yummy: mushrooms, spinach, onions, bell peppers, garlic (will definitely put garlic in next time!), tasty herbs, tomato, corn, etc. You’re really only limited by your imagination and what’s in your kitchen.

Please share pictures if you try it yourself, and let me know what extras you threw in!

Posted in Cooking | Tagged , , , | Leave a comment

Cooking

So, like I mentioned previously, I’ve been trying to cook more. The first thing I made was the Cheesy Potato Soup. Then I made Chicken-Fried Burgers, and Butter Garlic Pasta.  The chicken-fried burgers were delicious, and I thought pasta was alright. It called for either black or green olives with pimentos on top, and I used the green since I had them on hand. Next time I will definitely try it with black because the green was just a little too strong for me.

Now, please remember this is the same girl who 6 months ago was (1) not allowed in a kitchen without supervision (no, seriously!), (2) couldn’t hard boil eggs, and (3) until a week ago couldn’t do anything BUT hard boil eggs; and is now cooking full meals (dishes)!
After that, I made black beans. That didn’t turn out the best. I didn’t season them when I was cooking them, so they were a little bit sad. I will season them when I warm them up to eat them though (I made a bunch in preparation for some burritos we’re having tomorrow night, and froze the rest for later).

So, when I was trying to create a basic recipe book, since I am very picky, and prefer vegetarian meals, I stumbled across this recipe for Quinoa Patties.

I made sure to buy the stuff needed at the grocery store this week, and I’m so glad I decided to give this one a shot. SO GOOD! I added a handful of mushrooms to mine, and at the end slathered it with avocado like the recipe recommends.

Two notes: 1. Don’t use as much garlic as the recipe calls for. It overpowers everything, which is fine if you REALLY like garlic, and don’t mind garlic breath. I wasn’t impressed. 2. Try it plain with the avocado first. And don’t be shy with the avocado (particularly if there’s too much garlic). Delicious!!

I managed to get 10 patties out of it, and they are FILLING. I ate 3 last night for dinner and was stuffed. Put the rest in tupperware in the fridge. Had 2 for lunch today, and they are just as good cold as they are warm. I will DEFINITELY be making this recipe again.

I did try some of the quinoa before I cooked the patties. Just poured a little soy sauce on, and it tasted a lot like the rice from Japanese restaurants. Delish.

Posted in Cooking | Tagged , | 1 Comment

Backyard Harvest

So I decided that since today was so lovely (70 and breezy here in lovely Southern California), I would go take a look at what’s ready for harvest in our yard.

I started with the little lemon bush we have. It’s a sad little thing in the front yard. It would probably be much bigger and healthier if it had more space (it’s growing in the small dirt patch between the walkway and the driveway. Only a few of the lemons were ripe, but that’s ok. I couldn’t eat a whole ton all at once anyway.

Next I went out back and checked on the avocado tree. Nothing ready, but they’re starting to grow bigger and plump up (can’t wait til they’re ready!!).

Then I went over to our monster cherry tomato bush. Sean’s step-dad used to plant cherry tomatoes between all the rose bushes when he lived here. He would have to tear them out and replant every year, because they never made it longer than a season. He hasn’t lived here in a year and a half, and I haven’t replanted anything. There are only two cherry tomato bushes left, and one of them is kind of sad-looking (probably needs a trellis to climb up). The other one, however, decided to take over on of the rose bushes it was planted next to. Now this plant is a monster rose/tomato hybrid, and a monster to try to harvest. You have to wear thick gloves because the rose bush is all tangled with the tomatoes, and it’s just not nice. However, the tomatoes go CRAZY. They love it! I got a huge bunch of them – awesome considering most people aren’t even planting their tomatoes yet!

Also, a random orange that fell over the wall from the neighbor’s yard. Score!Image

A while back, we noticed this weird “weed” growing in the middle of the yard. He was cleaning up, and decided to pull it. “WAIT!” I said, “It looks like it’s going to bloom or something! Let’s just give it a week or two and see what it does. There aren’t any other plants nearby, so it isn’t hurting anything to leave it.” So we waited. Sure enough a week or so later, it turned into a sunflower! We have no idea where it came from, or how the seed came to be planted in our backyard. We don’t really water any of the plants (they all seem to be doing just fine without our help!), so it’s just one big mystery how it got there and survived.

Today I decided to harvest it. I looked up online how long to wait and when to harvest and what not (the flower has long-since died, and all the petals fell off – I was afraid I had waited too long, and would lose all the seeds). Turns out, I waited just the right amount of time! Awesome!!

Image

I’m amazed at just how many seeds came out of this one sunflower! I’m not quite sure what to do with them all.

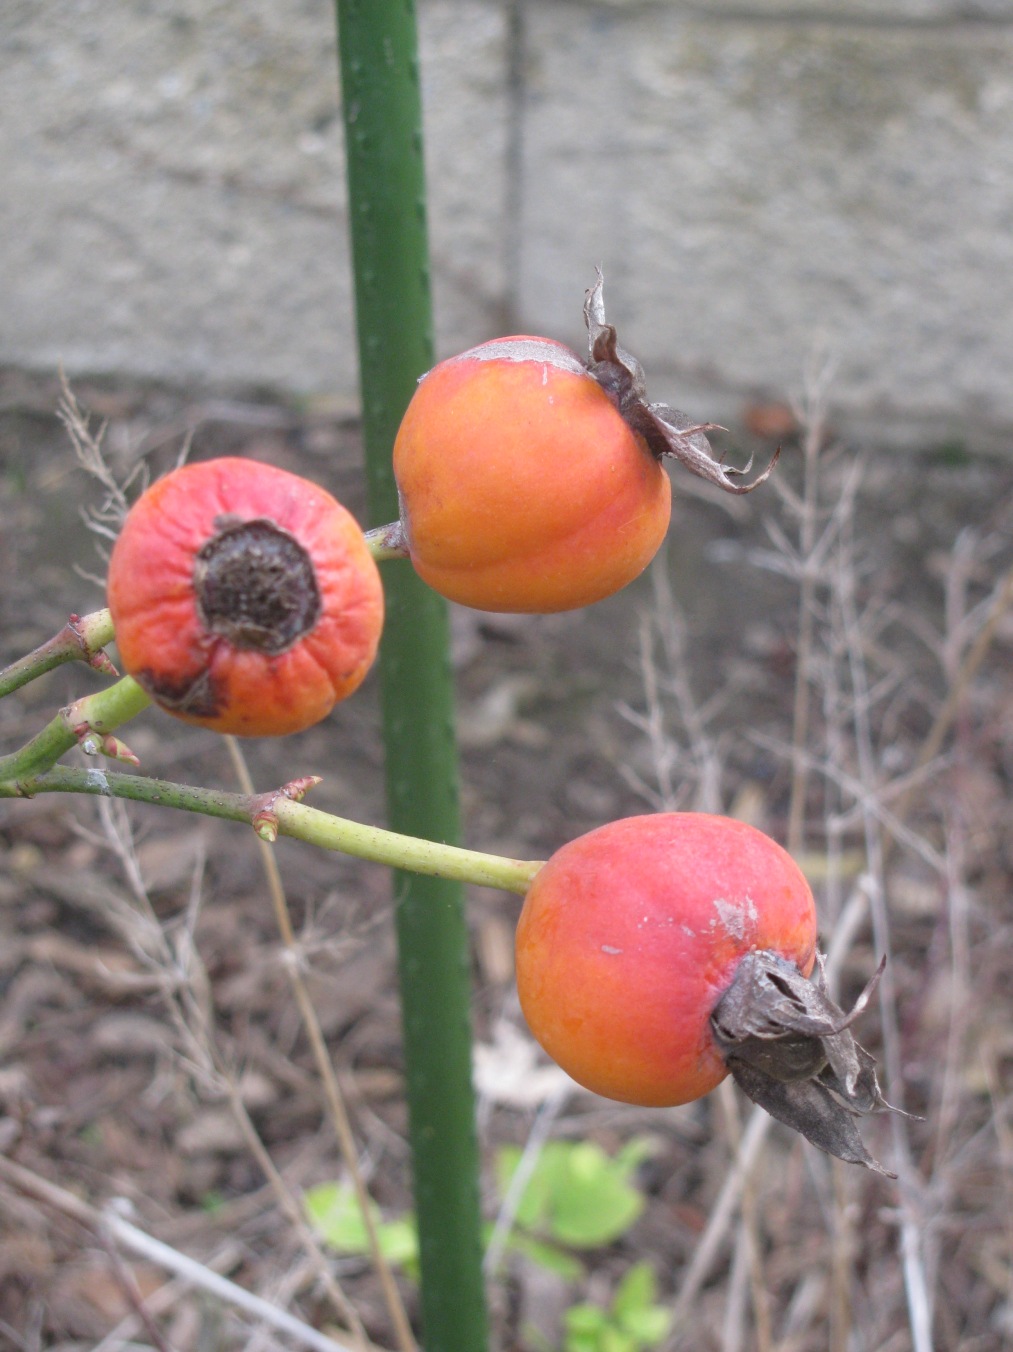
Also, I was looking at our rose bushes. Most of them aren’t blooming right now – it hasn’t been warm enough. But one of them has these big giant rose hips. Does anyone know how/when to harvest those? I tried looking it up, but I don’t know which type of roses they are (all of them are different, and they aren’t labelled or anything). Here’s a picture of some of the rose hips now.Image

Posted in Gardening, Home | Leave a comment

I DIDN’T BURN THE HOUSE DOWN!!

YAYYYYYYY!!!

For those of you that don’t know me, I am absolutely handicapped in the kitchen. I can make cereal. And sandwiches. Provided they aren’t grilled or use a panini press or any of that nonsense. Oh! And I make a damn good glass of milk. By “make,” I mean “pour.”

Up until my nanny job, I couldn’t (and wasn’t allowed to) hard boil eggs. I attempted on two other occasions, and failed miserably both times, and was henceforth banned from the kitchen in my house growing up (please note the 2nd time I attempted hard boiled eggs, I left the room, and promptly forgot about them. Hence the “hurray, I didn’t burn the house down” comment. By the way, burnt egg chunks floating in an inch of water on a pan that is probably burned past future usability smells AWFUL!).

So tonight I decided once and for all: SCREW THIS! If I want to be a stay-at-home mom some day, I need to get past this “I DON’T cook” thing.

After much research (about an hour and a half browsing the internet) looking for the perfect recipe (one that we already had the ingredients for, and one that seemed absolutely fool-proof), I decided on Cheesy Potato Soup.

I /did/ mess with the recipe a smidge, because I HATE onions, and because when I was done making it, Sean complained that the chunks of potato looked too big, and could I just mash them a little…

So here is the recipe that I made (sorry, I don’t have any pictures of it, I’ll try to take pictures next time of things I make).

Cheesy Potato Soup: (Not the best picture, but SOOO tasty!)

Ingredients:

1 tablespoon butter

2 ½ tablespoons all-purpose flour

3 cups chopped red potato (about 1 pound)

1 ¼ cups milk

¾ cup chicken broth

½ cup water

1 cup (4 oz) shredded cheddar cheese

1/8 teaspoon black pepper

Directions:

Melt butter in medium saucepan over high heat. Sprinkle and mix in flour. Add potato, milk, broth, and water to pan; bring to boil. Cover, reduce heat, and simmer 10 min. Add cheese and pepper; cook 2 minutes or until cheese melts. As cheese melts, stir and mash potatoes.

See? This recipe is completely me-proof! Our only other changes, were that we both added a little salt to our bowls of it, and Sean added a sprinkle of chili flakes. It made enough for 2 large bowls for dinner, and there is still some more left over for him to take for lunch tomorrow.

Oh! Bonus!! I make cookies too. Albeit they were pre-packaged (once I finish the pre-packaged ones we bought a while back, I’m definitely going back to made from scratch). His dad got some for Christmas, though, and calls them “crack cookies.” They’re just chocolate chip cookies, but there’s something about them that makes you want to eat the ENTIRE batch RIGHT NOW.

Lemme know if anyone else tries the soup and how it turns out for you!!

Posted in Cooking | Tagged | Leave a comment